In this tutorial, we are going to explain how to serialize and deserialize an object of Django model class. For those who are not aware of what is serialization and its counterpart deserialization, here's a recap:
Serialization is the process saving the state of an object, so that later on it could be shared by a remote location through the network.
Deserialization is a process of extracting the saved object, back to its original form.
To explain the concept of serialization and deserialization, we will have to connect the Django Framework with a database and in this example, we are going to connect it to - Oracle Database 18c Express Edition Release 18.0.0.0.0.
If you are trying to connect Django Framework with Oracle database, then you need to install the cx_Oracle package.
Softwares required before we install cx_Oracle
To connect Python with Oracle database using cx_Oracle, we need the have the following software packages installed in our system:
You must have installed Django(we have Django 2.2.2 version).
You must have installed Python(we have Python 3.7.3 version).
Note: Please make sure to follow the links of the above software packages to install the correct and the latest version(at the time of writing this tutorial)of each software. An older version of any of these software may not work the new version of the other mentioned software.
Once we have installed all the above mentioned software packages, we need to move to the next step i.e. installing the cx_Oracle module.
Installing cx_Oracle package
The cx_Oracle is a module which acts as a communication channel between Python API and Oracle database.
To install the cx_Oracle, you need to open the command prompt and move to the directory where the pip.exe is present on your system.
Once you've correctly installed the Python languages, the directory of pip.exe is - "C:\Users\User_Name\AppData\Local\Programs\Python\Python37\Scripts"
Move to the above mentioned directory and enter the following command:
pip install cx_Oracle
This installs the cx_Oracle in our system.
And that's it! We have installed all the important software packages needed to connect Django Framework with Oracle database using Python language.
So, let's make a Django project to explain the concept of serialization and deserialization.
Creating a Django project
To create a directory for our project, we need to open the Command Prompt and type in the command -
django-admin startproject django_serialization
dhago-admin is a management utility for Django Framework, using which we could create a new project and much more.
startproject is a command to start a new Django project.
django_serialization is the name of our Django project and also the name of our project directory created in the current directory.
The startproject command gives us a sub-directory and files
Executing the startproject command has not only created a project directory named django_serialization, but has also created a file manage.py and another sub-directory
with the same name as the project directory, which also contains some Python files -
django_serialization is the root directory of our Django project, also known as the container of our project.
manage.py is a command-line utility which allows us to interact with Django project in various ways.
django_serialization sub-directory is actually a Python package for our project. We can import this package(a group of modules) and its contents just like we import any general Python package/module and its contents.
__init__.py is a file which allows our sub-directory django_proj1 to be treated as a Python package.
settings.py is a file used for setting the configurations for our Django project.
urls.py is a file used to specify the URL declarations for our Django project, also known as a a table of contents.
wsgi.py is a file used as an entry-point for WSGI web-servers to serve your project.
Starting the development server
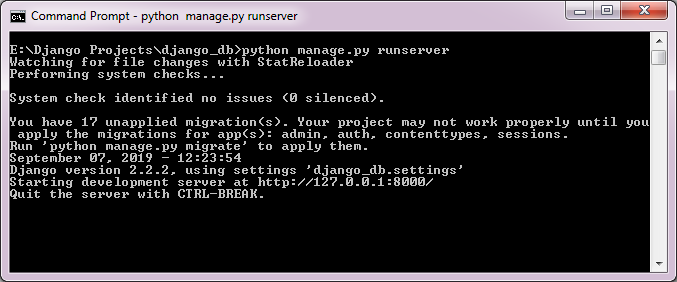
After creating the project directory and the files required to run our Django project, it is time to execute the Django Development Server. To do this,
we will have to open the command prompt, change the current directory to the root directory of our Django project and execute the following command.
python manage.py runserver
Executing the above mentioned command will trigger the Django Development Server in action, as you can see in the picture below.
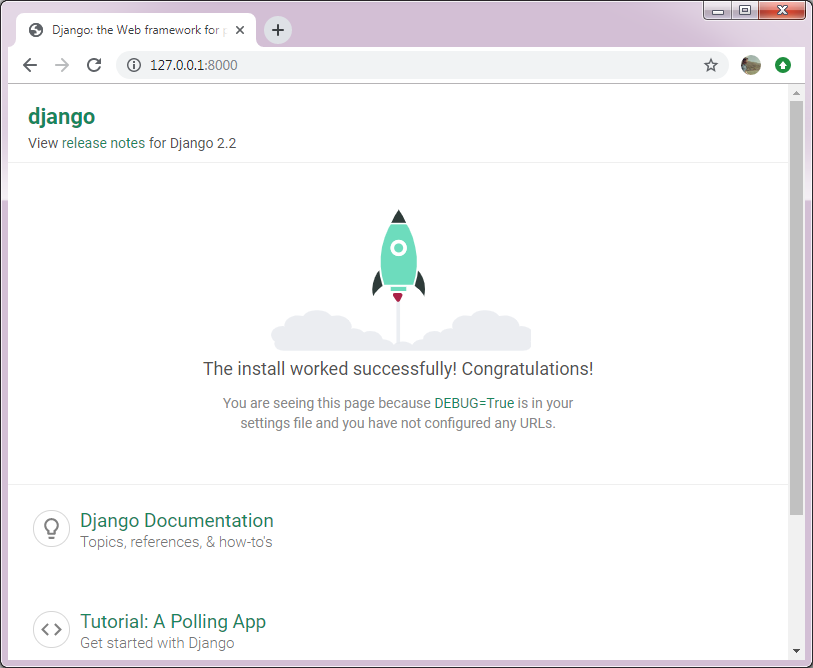
Now that you have successfully started the Django development server, it is time to visit the http://127.0.0.1:8000/ link and you will see a webpage displaying a congratulatory message, as shown below.
Note: The runserver command runs the Django development server at the port 8000.
Creating an app in our project
A project may contain one or multiple applications. As we have already created a project, now let us create a welcome application in it which welcomes the user. This application will be created right under our root - project directory django_serialization.
To create an application, we have to open another window command prompt, change the current directory to the root directory of our Django project and execute the following command -
python manage.py startapp serialization
The command startapp in combination with manage.py utility is used to create an app of a project, using which we have created an app named - serialization.
Executing the startapp command has not only created an application directory named serialization in the root - project directory, but has also created the following set of Python files -
Next, we have to create a model class, where each model class corresponds to a database table on which we could perform database operations by using the Django Framework.
Each model class is a subclass of django.db.model.Model class.
Note: The upcoming model class - User_Info is defined in the file models.py, which is already created and stored in our application directory, serialization. Let us just copy and paste the following code in models.py.
models.py
from django.db import models

# Creating our model class - User_Info

class User_Info(models.Model):
    name = models.CharField(max_length=30)
    address = models.CharField(max_length=50)
    city = models.CharField(max_length=30)
    state = models.CharField(max_length=50)
    country = models.CharField(max_length=30)


    def __str__(self):
        return (self.name + ', ' +  self.address + ', ' +  self.city + ', ' +  self.state + ', ' + self.country)
Each model class could have a number of class variables, where each class variable represents a database field in the database table.
Each database field is represented by an appropriate Field class, such as -
CharField class is used to specify character fields
DataTimeField class is used to specify the datetimes field.
URLField class is used to specify a URL field.
The name of the field is used a column name in the database table.
As you can see in the model class User_Info, we have defined its class variables such as name, address, city, state, country using the appropriate Field classes, where each of these class variables correspond to a column name in the database table.
Note: Django automatically gives an integer primary key field called id to each model class.
Installing the Model
Next, we need to add the app serialization to our project by adding the reference to its configuration class in the INSTALLED_APPS property within the settings.py file(which is present within the django_serialization folder).
The SerializationConfig configuration class named SerializationConfig is present in the apps.py file within the app serialization folder.
Within the settings.py file, you need to locate the property INSTALLED_APPS and copy-paste the full-path of this configuration file against it, as shown below and save the file.
Now Django Framework will include the serialization app on executing this Django project.
Storing the migrations
Next, we need to execute the makemigrations command to tell Django Framework that we have made some changes to the existing models or have specified new models and in our case, we have specified a new model class - serialization.
We can execute the makemigrations command from within the project directory in combination with the manage.py file, as shown below.
python manage.py makemigrations serialization
On executing the makemigrations command, the Django Framework store these changes as migrations within the file named 0001_initial.py, which is stored within the migrations folder of the serialization app, as shown in the picture below.
E:\Django Projects\django_serialization>python manage.py makemigrations serializ
ation
Migrations for 'serialization':
  serialization\migrations\0001_initial.py
    - Create model User_Info
Note: Migrations are just files specifying the changes to the existing models or when we specify new models.
Specifying the database configuration
Next, we need to specify the database configurations within the settings.py file(which is present within the django_serialization folder). These database configurations tells Django which database we are going to use and how to connect it. The database configurations settings could be different depending on the database you are using to connect to using the Django Framework.
Note: The upcoming database configurations are specific to Oracle Database.
Within the settings.py file, you need to locate the property DATABASES and specify the database configurations against each database setting such as engine, name, user, password, host, port, as shown below. Save the file once you've specified the database configurations.
While specifying the database setting, such as - password and host, please enter your Oracle's database password and username.
Now, using these database configurations, the Django Framework will be able to connect to the Oracle Database.
Executing the "sqlmigrate" command
If you want to see the SQL statements required to implement the migrations that we have stored, then please execute the sqlmigrate command, as shown below.
python manage.py sqlmigrate serialization 0001
The sqlmigrate command should be executed with manage.py, followed by the name of the app, which in our case is serialization, followed by the name the migration file that we have just created, which in our case is 0001, and it returns its equivalent SQL commands, which is displayed in the picture below.
E:\Django Projects\django_serialization>python manage.py sqlmigrate serializatio
n 0001

--
-- Create model User_Info
--
CREATE TABLE "SERIALIZATION_USER_INFO" ("ID" NUMBER(11) GENERATED BY DEFAULT ON
NULL AS IDENTITY NOT NULL PRIMARY KEY, "NAME" NVARCHAR2(30) NULL, "ADDRESS" NVAR
CHAR2(50) NULL, "CITY" NVARCHAR2(30) NULL, "STATE" NVARCHAR2(50) NULL, "COUNTRY"
 NVARCHAR2(30) NULL);
COMMIT;
Please Note:
The sqlmigrate command does not execute any SQL statement and no database table is created after executing this command, it only shows us the SQL statements required to implement our stored migrations. To execute these SQL statements, we need to execute the migrate command.
As you can see from the SQL statments in the picture above, a table serialization_User_Info will be created i.e. name of the app combined with an underscore(_) and name of the model class specified in the models.py file.
Executing the "migrate" command
So far, we have only stored the database migrations and have seen the SQL statments required to implement the migrations in a database. Now let's execute these SQL statements to implement the migrations and apply the changes to the database by using the migrate commmand, as shown below.
python manage.py migrate
The migrate command should be executed with manage.py and it applies the stored migrations(as shown below) and creates the necessary database tables corresponding to the model classes specified the file, models.py.
E:\Django Projects\django_serialization>python manage.py migrate
Operations to perform:
  Apply all migrations: admin, auth, contenttypes, serialization, sessions
Running migrations:
  Applying serialization.0001_initial... OK
On executing the migrate command, a new database table serialization_User_Info is created, which you can verify by entering the folliwing SQL command at the SQL prompt in SQL PlUS:
SQL> select * from customer_customer_info;

no rows selected

SQL>
Inserting the data into database
Once we have created a database table, we can simply insert a row of data in this table by executing a few commands in Python and then perform serilization and deserialization as well. To do this, first we have to exeute the following command at the command prompt which opens the Python shell, with a prompt >>>.
python manage.py shell
At Python Shell, we are going to enter a few Python statements to insert the data in this database table, as shown below. We are first going to import our model class User_Info, create its object and save it.
E:\Django Project2\django_serialization>python manage.py shell
Python 3.7.3 (v3.7.3:ef4ec6ed12, Mar 25 2019, 22:22:05) [MSC v.1916 64 bit (AMD6
4)] on win32
Type "help", "copyright", "credits" or "license" for more information.
(InteractiveConsole)
>>> from serialization.models  import User_Info
>>> cust1 = User_Info(name='Rick', address='101 N Monroe St', city='Tallahassee', state='Florida', country='USA')
>>> cust1.save()
>>> User_Info_list = User_Info.objects.all()
>>> User_Info_list
<QuerySet [<User_Info: Shawn, 101 N Monroe St, Tallahassee, Florida, USA>]>
>>> from django.core import serializers
>>> data = serializers.serialize("xml",user_info_list)
>>> for obj in serializers.deserialize("xml",data):
...     print(obj.object)
Rick, 101 N Monroe St, Tallahassee, Florida, USA
Program Analysis:
from serialization.models import User_Info
We have first imported our model class User_Info, which is defined in the file models.py stored within our app serialization
user1 = User_Info(name='Rick', address='101 N Monroe St', city='Tallahassee', state='Florida', country='USA')
Next, we have created and initialized an object of this model class.
user1.save()
Finally, we have saved this object by using the save() function, which saves a row of data in the database table.
User_Info_list = User_Info.objects.all()
Next, we are going to retrieve all the saved object of the model class User_Info from the database, by calling the all() method of Django, like User_Info.objects.all(). This retrieves and returns a QuerySet that contains all User_Info objects in the database.
User_Info_list
At the end, we are just going to print the QuerySet object User_Info_list to display the values of the saved object in the database.
from django.core import serializers
Next, we have imported the class serializers.
data = serializers.serialize("xml",user_info_list)
Next, we have called the serialize() function with two arguments:
The format to serialize the data(could be xml, json or more ), and
The QuerySet to serialize and in our example the QuerySet was user_info_list.
And this saves the object referenced by the QuerySet, or in other words, performs the process of serialization of an object of Django model class and returns us the serialized form of the object, referenced by data.
for obj in serializers.deserialize("xml", data):
...     print(obj.object)
Next, we have called the deserialize() function with the two arguments within a for-loop;
The format used to serialize the data(in our case it was xml ), and
The serialized object i.e.data.
The deserialize() function returns an iterator, obj, to a single object(or a group of object) on which serialization were performed. Using this iterator, we have printed the value of original object.
Displaying the saved object using SQL PLUS
Additionally, you could even run the SQL PlUS to see the content of the database table that we have just created and inserted data into, by entering the following SQL command at the SQL prompt:
SQL> select * from serialization_User_Info;

        ID  NAME        ADDRESS       CITY        STATE       COUNTRY
----------  ----------  ------------  ----------  ----------  -------------
        23  Rick      101 N Monroe  Tallahasse  Florida     USA
And this concludes our tutorial on how to perform the process of serialization and deserialization on the object of Django Model class.